
Overview
Manage Inventory is a simple way of moving inventory in and out of storage with Puts and Pulls, or moving it around the warehouse from one location to another with the Move or Bulk Move function.
WarehouseOS now supports Inventory adjustments to be made from WOS Manager, in addition to the Manage Inventory app on WOS Fulfillment (iPad). Puts, Pulls, and Moves can all be performed directly from the desktop UI.
Inventory can be:
- Added with a Put
- Subtracted with a Pull
- Transferred between locations with a Move
These actions are available from the Inventory grid and can be initiated either from the grid action buttons or from a specific inventory record. Inventory transactions performed from WOS Manager will still create records in the History Log and send Host Triggers (if enabled).
Accessing Manage Inventory Functions
Manage Inventory functions can be accessed in WOS Manager by going to Inventory -> Inventory. There are two options for performing these actions: actions at the top of the grid or inline actions for specific inventory records.
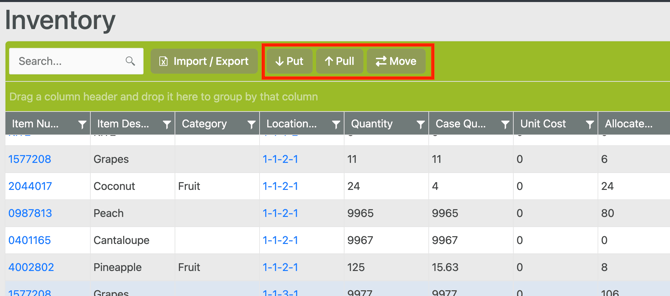
Grid Actions
The actions at the top of the Inventory grid allow a Put, Pull, or Move to be performed by searching for any item and location during the transaction.
Inline Actions
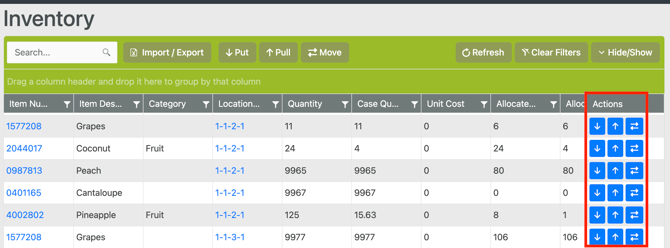
Inline actions are available on individual inventory records within the Inventory grid.
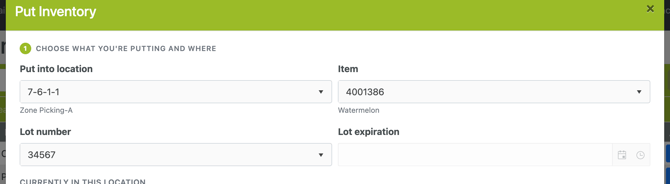
When an inline action is selected, the item and location associated with the selected inventory record are automatically populated, reducing the amount of information that must be entered.
Put Inventory
A Put increases the inventory quantity of an item at a selected location.
Common uses include:
- Receiving inventory into stock
- Correcting inventory discrepancies
- Adding back returned items
- Recording inventory found during an audit or count (consider using Cycle Counting for this)
Perform a Put From Grid Actions
- Navigate to the Inventory grid.
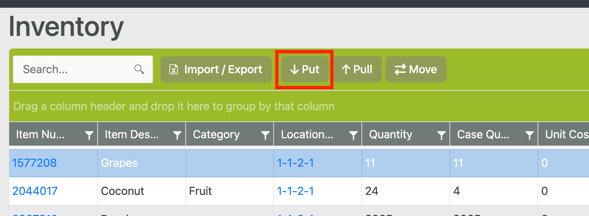
- Select Put.
- Select the destination Location and Item.
If a scanner is connected to the computer, these can be scanned directly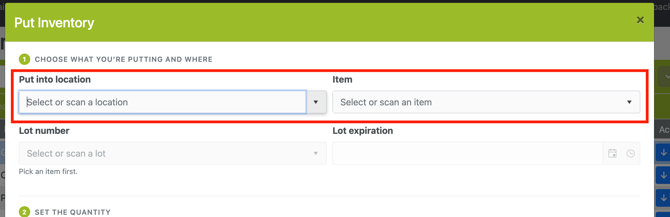
- If the Item is Lot Required, select from an existing lot number or enter a new one. Add an expiration date.
- Set the Quantity - 2 options
- Enter a quantity to Put - directly adds the amount entered
- Enter a resulting quantity - calculates the amount to add to get from the original quantity to the resulting quantity entered

- Add a Reason Code or Note.

- Review the transaction summary at the bottom
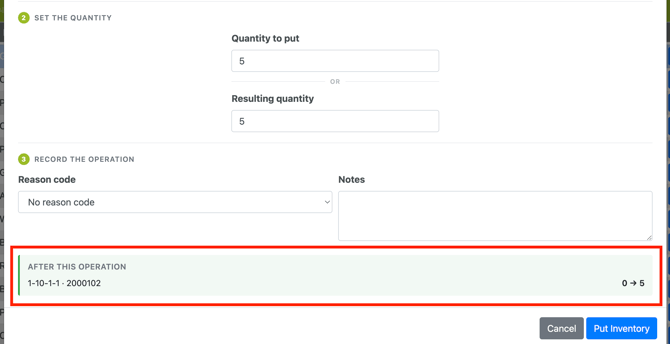
- Select Put Inventory and complete the transaction.
Perform a Put From an Inventory Record (Inline)
- Navigate to the Inventory Grid.
- Locate the inventory record.
- Select the inline Put action.
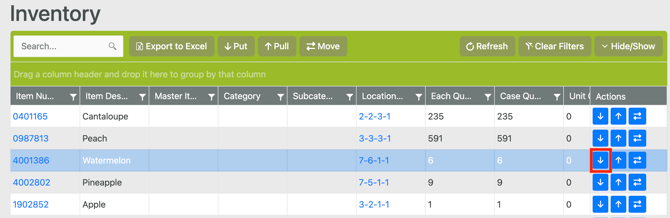
- Verify the item and location. And lot number if applicable.
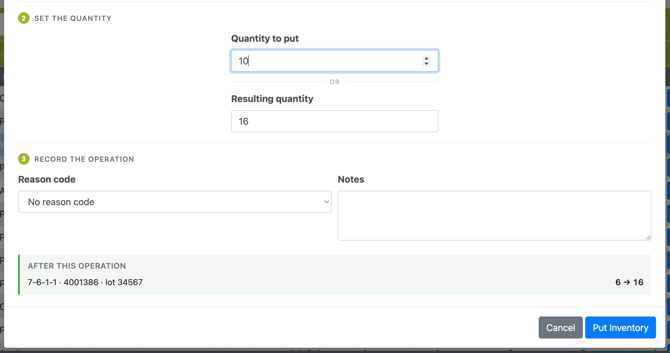
- Set the Quantity - 2 options
- Enter a quantity to Put - directly adds the amount entered
- Enter a resulting quantity - calculates the amount to add to get from the original quantity to the resulting quantity entered
- Add a Reason Code or Note.
- Review the transaction summary at the bottom
- Select Put Inventory and complete the transaction.
Pulls
A Pull decreases the inventory quantity of an item at a selected location.
Common uses include:
- Removing damaged inventory
- Correcting inventory variances
- Recording inventory consumed outside normal workflows
Perform a Pull From Grid Actions
- Navigate to the Inventory grid.
- Select Pull.
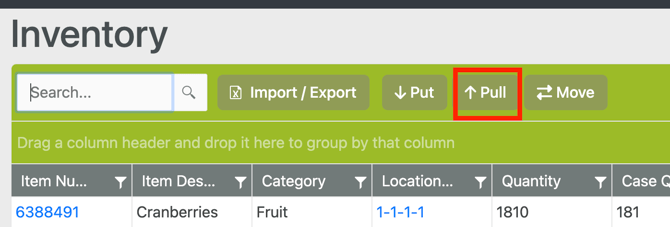
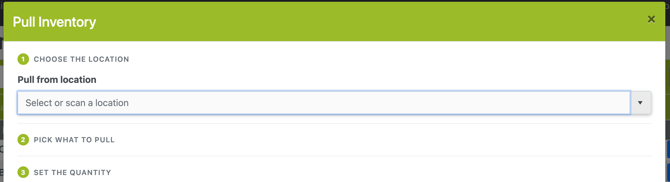
- Select or scan a Location.
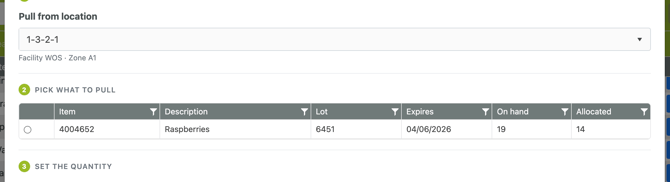
- Select the Item to Pull - a list will show with inventory records at the selected location to choose from.
- Set the Quantity (see Puts above for more details on quantity options)
- Add a Reason Code or Note.
- Review the transaction summary at the bottom.
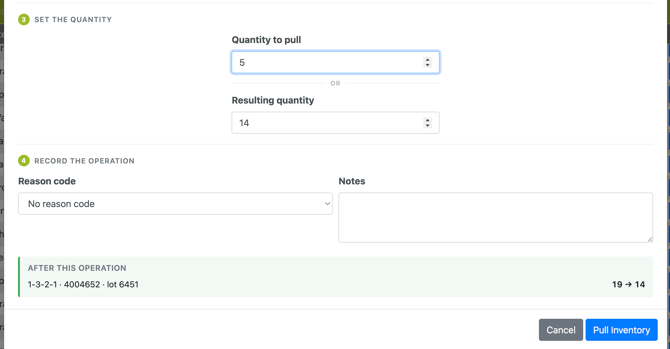
- Select Pull Inventory and complete the transaction.
Perform a Pull From Inventory Record (Inline action)
-
Navigate to the Inventory grid.
- Locate the inventory record.
- Select the inline Pull action. The Location and Item will be pre-populated
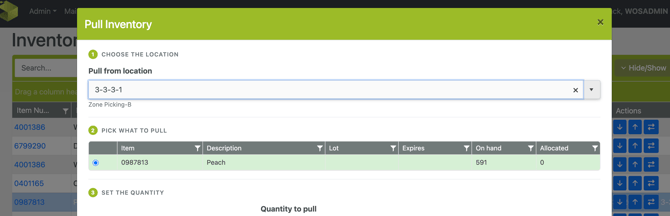
- Set a Quantity.
- Add a Reason Code or Note.
- Review and Complete the Pull transaction.
Moves
Inventory can be moved from one location to another without affecting inventory quantities. The Move function reassigns inventory from its current location to a new location. Any portion of the inventory may be transferred, allowing for either partial or full quantity moves.
Perform a Move from the Grid
- Navigate to the Inventory grid.
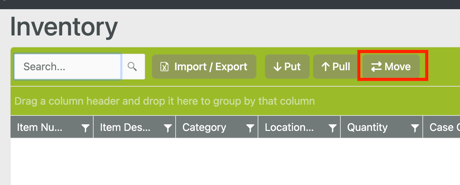
- Select Move.
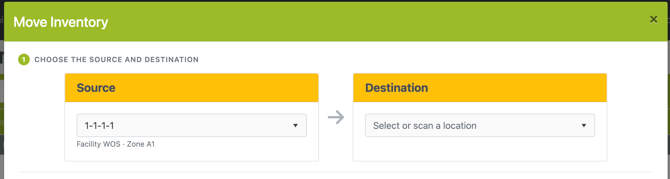
- Step 1: Select or enter a Source and Destination location
- Step 2: Select an Item to Move
Tip: If several items are stored at the Source location, an item can always be searched or filtered for in the Contents grid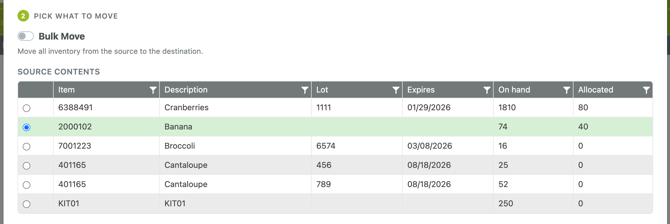
- Step 3: Set the Quantity that will be moved

- Step 4: Add a Reason Code or Note

- Review and confirm the updated quantities and Move Inventory

Bulk Moves
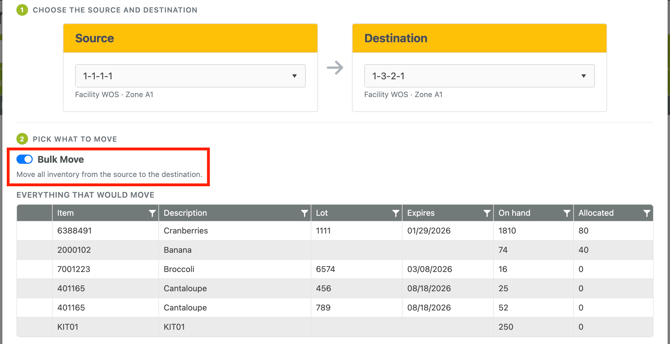
The Bulk Move option is designed to transfer all inventory from one location to another in a single transaction. Common use cases may include:
- Moving pallets of inventory with multiple items.
- Relocating inventory as part of a warehouse reorganization.
- Transferring all inventory from one storage area to another.
When enabled, the Bulk Move option automatically selects all inventory for all items at the Source location and transfers it to the Destination location. Individual item or quantity selection is not required.
Bulk Move is a flag that can be enabled during a Move action.
History Log
Inventory transactions performed through WOS Manager (Desktop) are recorded in the History Log using the same transaction record types as inventory adjustments performed in WOS Fulfillment. Desktop transactions are logged under the PullComplete, PutComplete, and MoveComplete record types.
While the record types are the same, there are a few differences in how desktop transactions are recorded:
- User displays the account that was logged in when the transaction was performed.
- Device is left blank, since the transaction was not performed from a device.
- Attributes indicates whether a host trigger was sent as part of the transaction.
These distinctions can be useful when identifying the source of a transaction during auditing or troubleshooting activities.
Host Triggers
When an inventory transaction is performed through WOS Manager, sending host triggers is optional. Host triggers are commonly used by integrations to initiate API messages and communicate inventory changes to external systems. For additional information, see API and Host Triggers.
When performing a Put, Pull, or Move transaction, the Send Integration Triggers option is available at the bottom of the transaction window. This option is enabled by default, ensuring that any configured integrations are notified of the transaction.
In situations where a transaction should not be communicated to integrated systems, the Send Integration Triggers option can be disabled before completing the transaction.
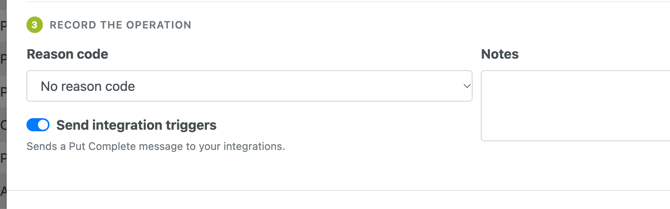
The Send Integration Triggers flag will only be visible if host triggers are setup and enabled on the site. To check this, go to Admin -> Integrations -> Host Triggers and view the list of triggers setup and enabled.